
Intro
In this post we are going to cover how you can use Terraform to create an Azure SQL Database. If you need help setting up Terraform please see my prior post, Terraform Azure: Setting Up Your Environment.This post assumes you have an Azure account. If you do not, you can create one for free.
We will take a slow approach to accomplishing our task. The goal here is to get familiar with Terraform and its commands by creating some basic resources. Terraform also has some great resources for getting started here.
As you go through the sections of this post you will see screenshots of the code with callouts that I will walk through. You can find all the code for this example on my GitHub repo.
Prerequisites
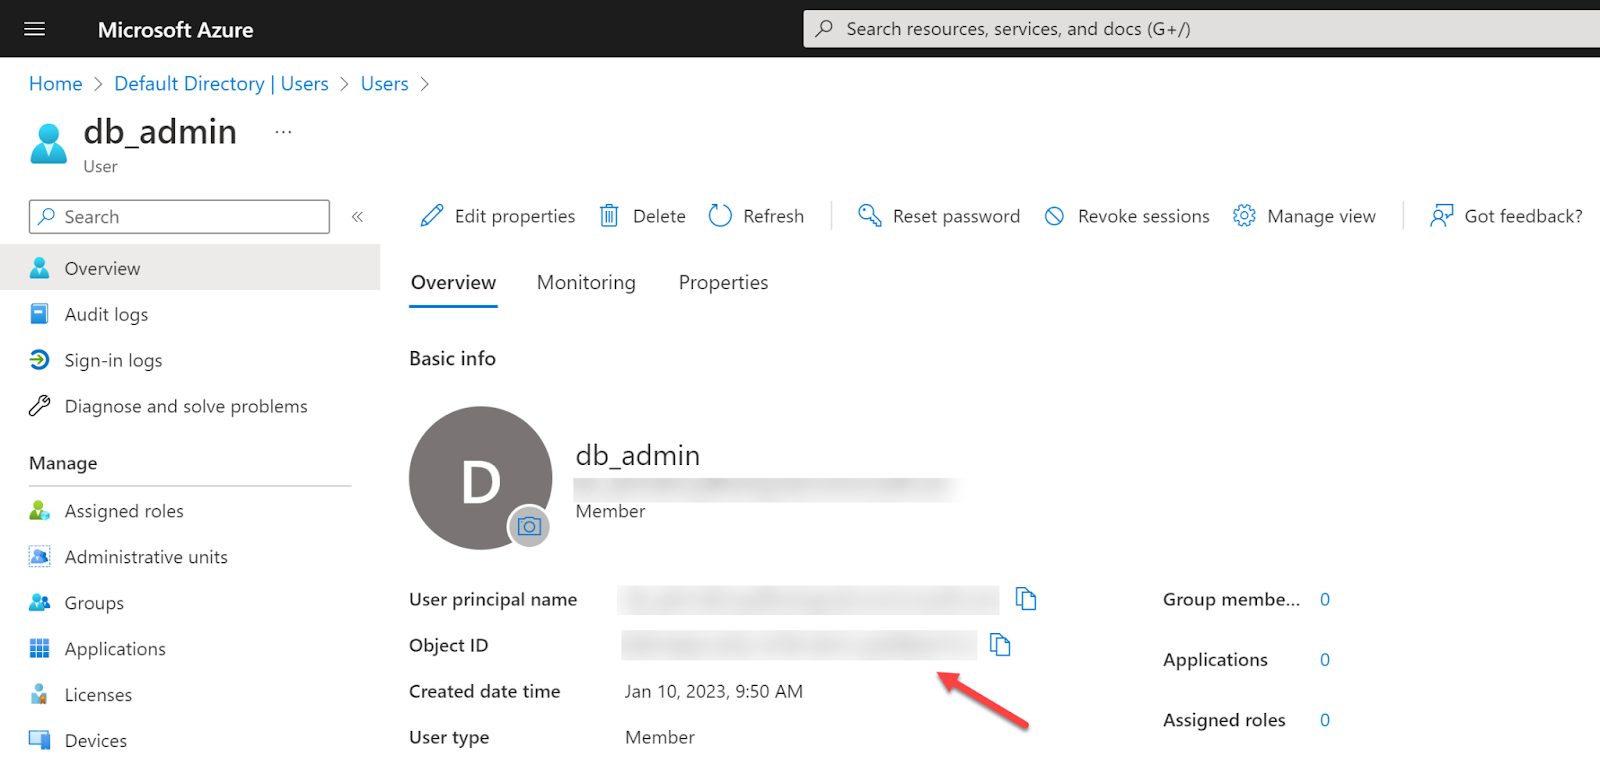
To create a SQL Database you will need a user to assign admin privileges to. To create a user follow these instructions. If you already have one then you are all set. What we will need from the user is its name and the object id.
Getting Started
- Fire up your favorite code editor, in this post I will be using VS Code
- Start a new folder for your project, mine is named sql-db
- Create new file named main.tf
The Provider
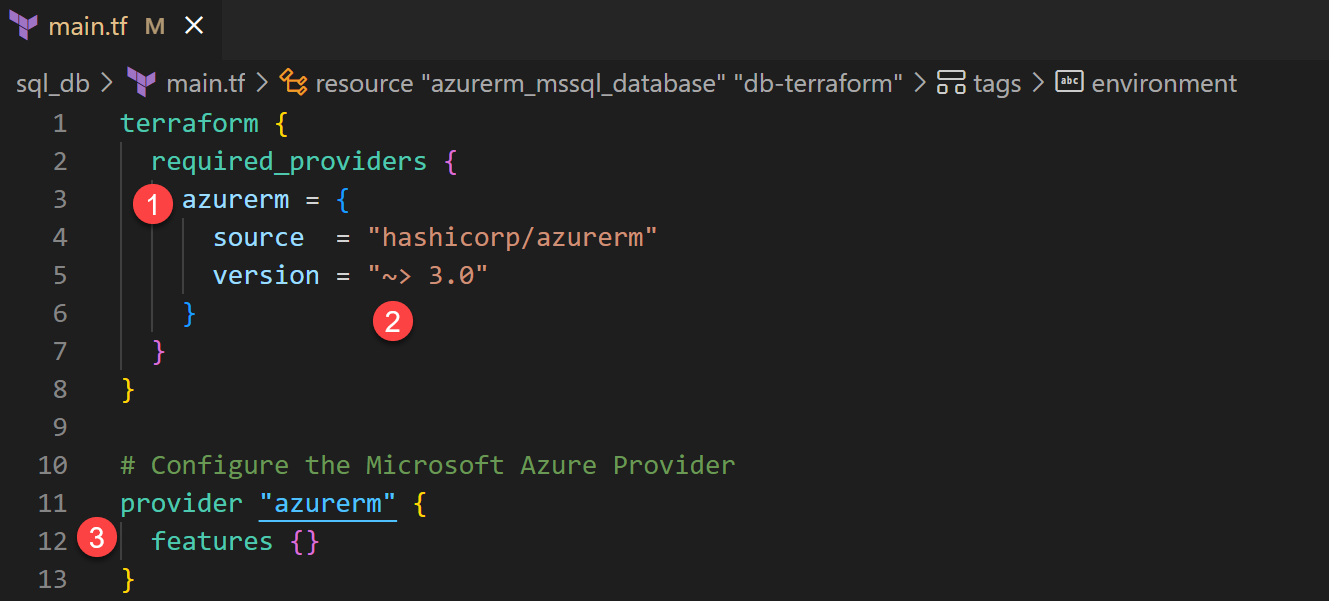
Up first is the Azure provider. You can find all the docs here. The code below will configure your project to pull the Azure provider and configure it.
- azurerm is the name of the Terraform Azure provider
- We are using version 3.0 or better
- This is required to configure the provider
Resource Group
Everything in Azure has to belong to a resource group, so that is the first resource we will create.
- Our resource group will be named rg-terraform
- I have set the Azure region for this to East US 2. You can set it to whatever region you prefer.

Server
In order to create a database we have to have a server for it to be a member of.
- Our server will be named sql-server-terraform
- This is a reference to our resource groups name
- This is a reference to our resource groups Azure region
- We are setting the server to the latest available version
- Here is where we need the name of the admin account we made
- Paste in the object id from the admin account
- Another item to note here is the azuread_authentication_only property. This is set to true so it will not use SQL Server authentication or mixed mode authentication. To configure mixed mode checkout the example in the Terraform documentation.
- Tag the resource with development environment

Database
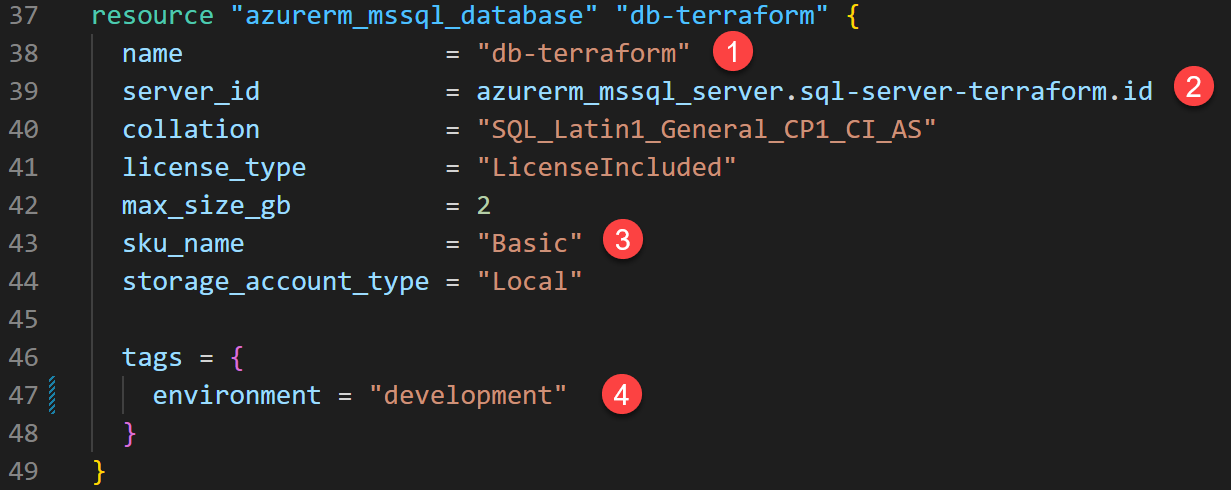
Finally, we have arrived at the database.
- We will be naming this database db-terraform
- This is referencing the id of the server we created
- The most important configurable option here is the sku_name. This is the value the pricing of your database is based on. I have it configured to the cheapest possible option. To get a full list of all the available SKUs you can run this command in powershell
az sql db list-editions --location “East US 2” --output table. - Tag the resource with development environment
Authenticate
You now have all your resources defined and are ready to deploy them to Azure.
The first thing we need to do is authenticate to Azure so Terraform can connect.
- Open a PowerShell terminal in VS Code and run az login. This will open a browser window that asks you to login to your azure account.

Initialize
Next we need to initialize our Terraform project.
- Use the terraform init command to initialize your project and download all the providers needed
- This message shows Terraform has initialized successfully

Plan
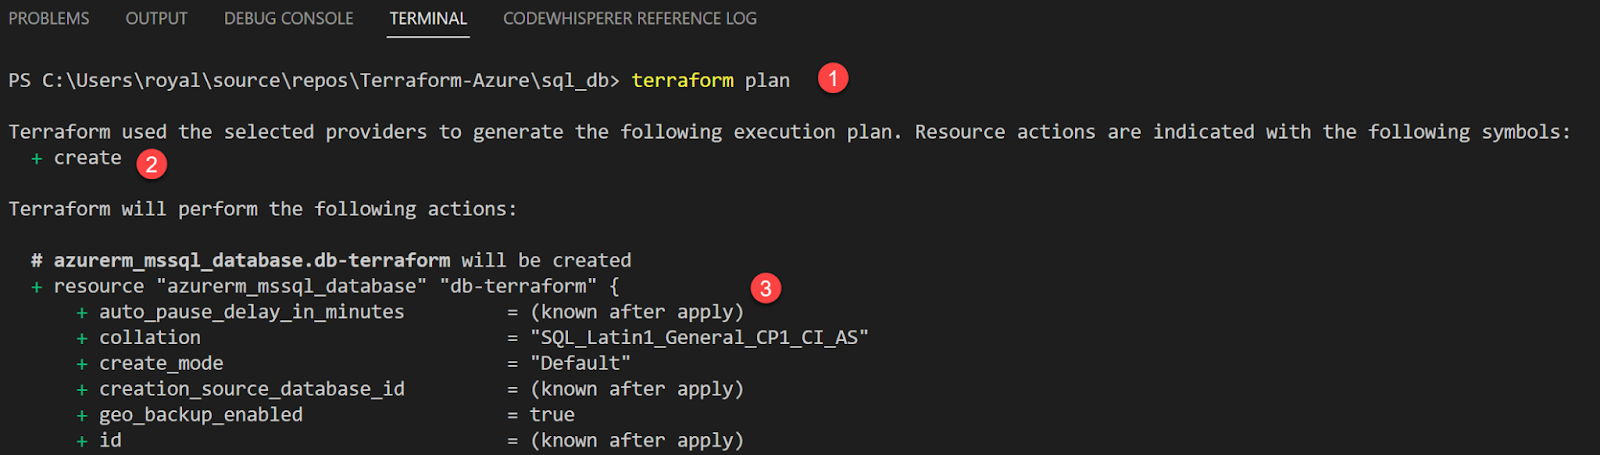
Now we get to see what Terraform is going to do.
- Here we are running terraform plan to get a listing of the changes Terraform will make to our Azure environment
- The green + indicates an object will be created
- Anything marked as (known after apply) is usually an id of some kind that Azure will generate after the object is created.
Apply
After we have reviewed the plan and decide we like it we can deploy the changes.
- To deploy our changes we run the terraform apply command
- Terraform will output all of the changes it will make and stop to prompt you to make sure you want to make the changes
- To confirm the changes enter yes
- The output will have a listing of Terraform’s progress
- If everything went well you will have a green success message at the bottom


Validate
To confirm everything worked let’s check our Azure account.
- Go to resource groups
- Open the tg-terraform resource group
- You should see the server and database resources we defined

Destroy
So we don’t land ourselves with a large bill, let’s destroy these new resources.
- To destroy these resources we run the terraform destroy command
- The red – indicates an object will be destroyed
- Terraform will output all of the changes it will make and stop to prompt you to make sure you want to make the changes
- To confirm the changes enter yes
- If everything went well you will have a green success message at the bottom


To confirm everything is gone, head back to your Azure account and refresh the page. You should see all of the new resources are now gone.
Leave a Reply